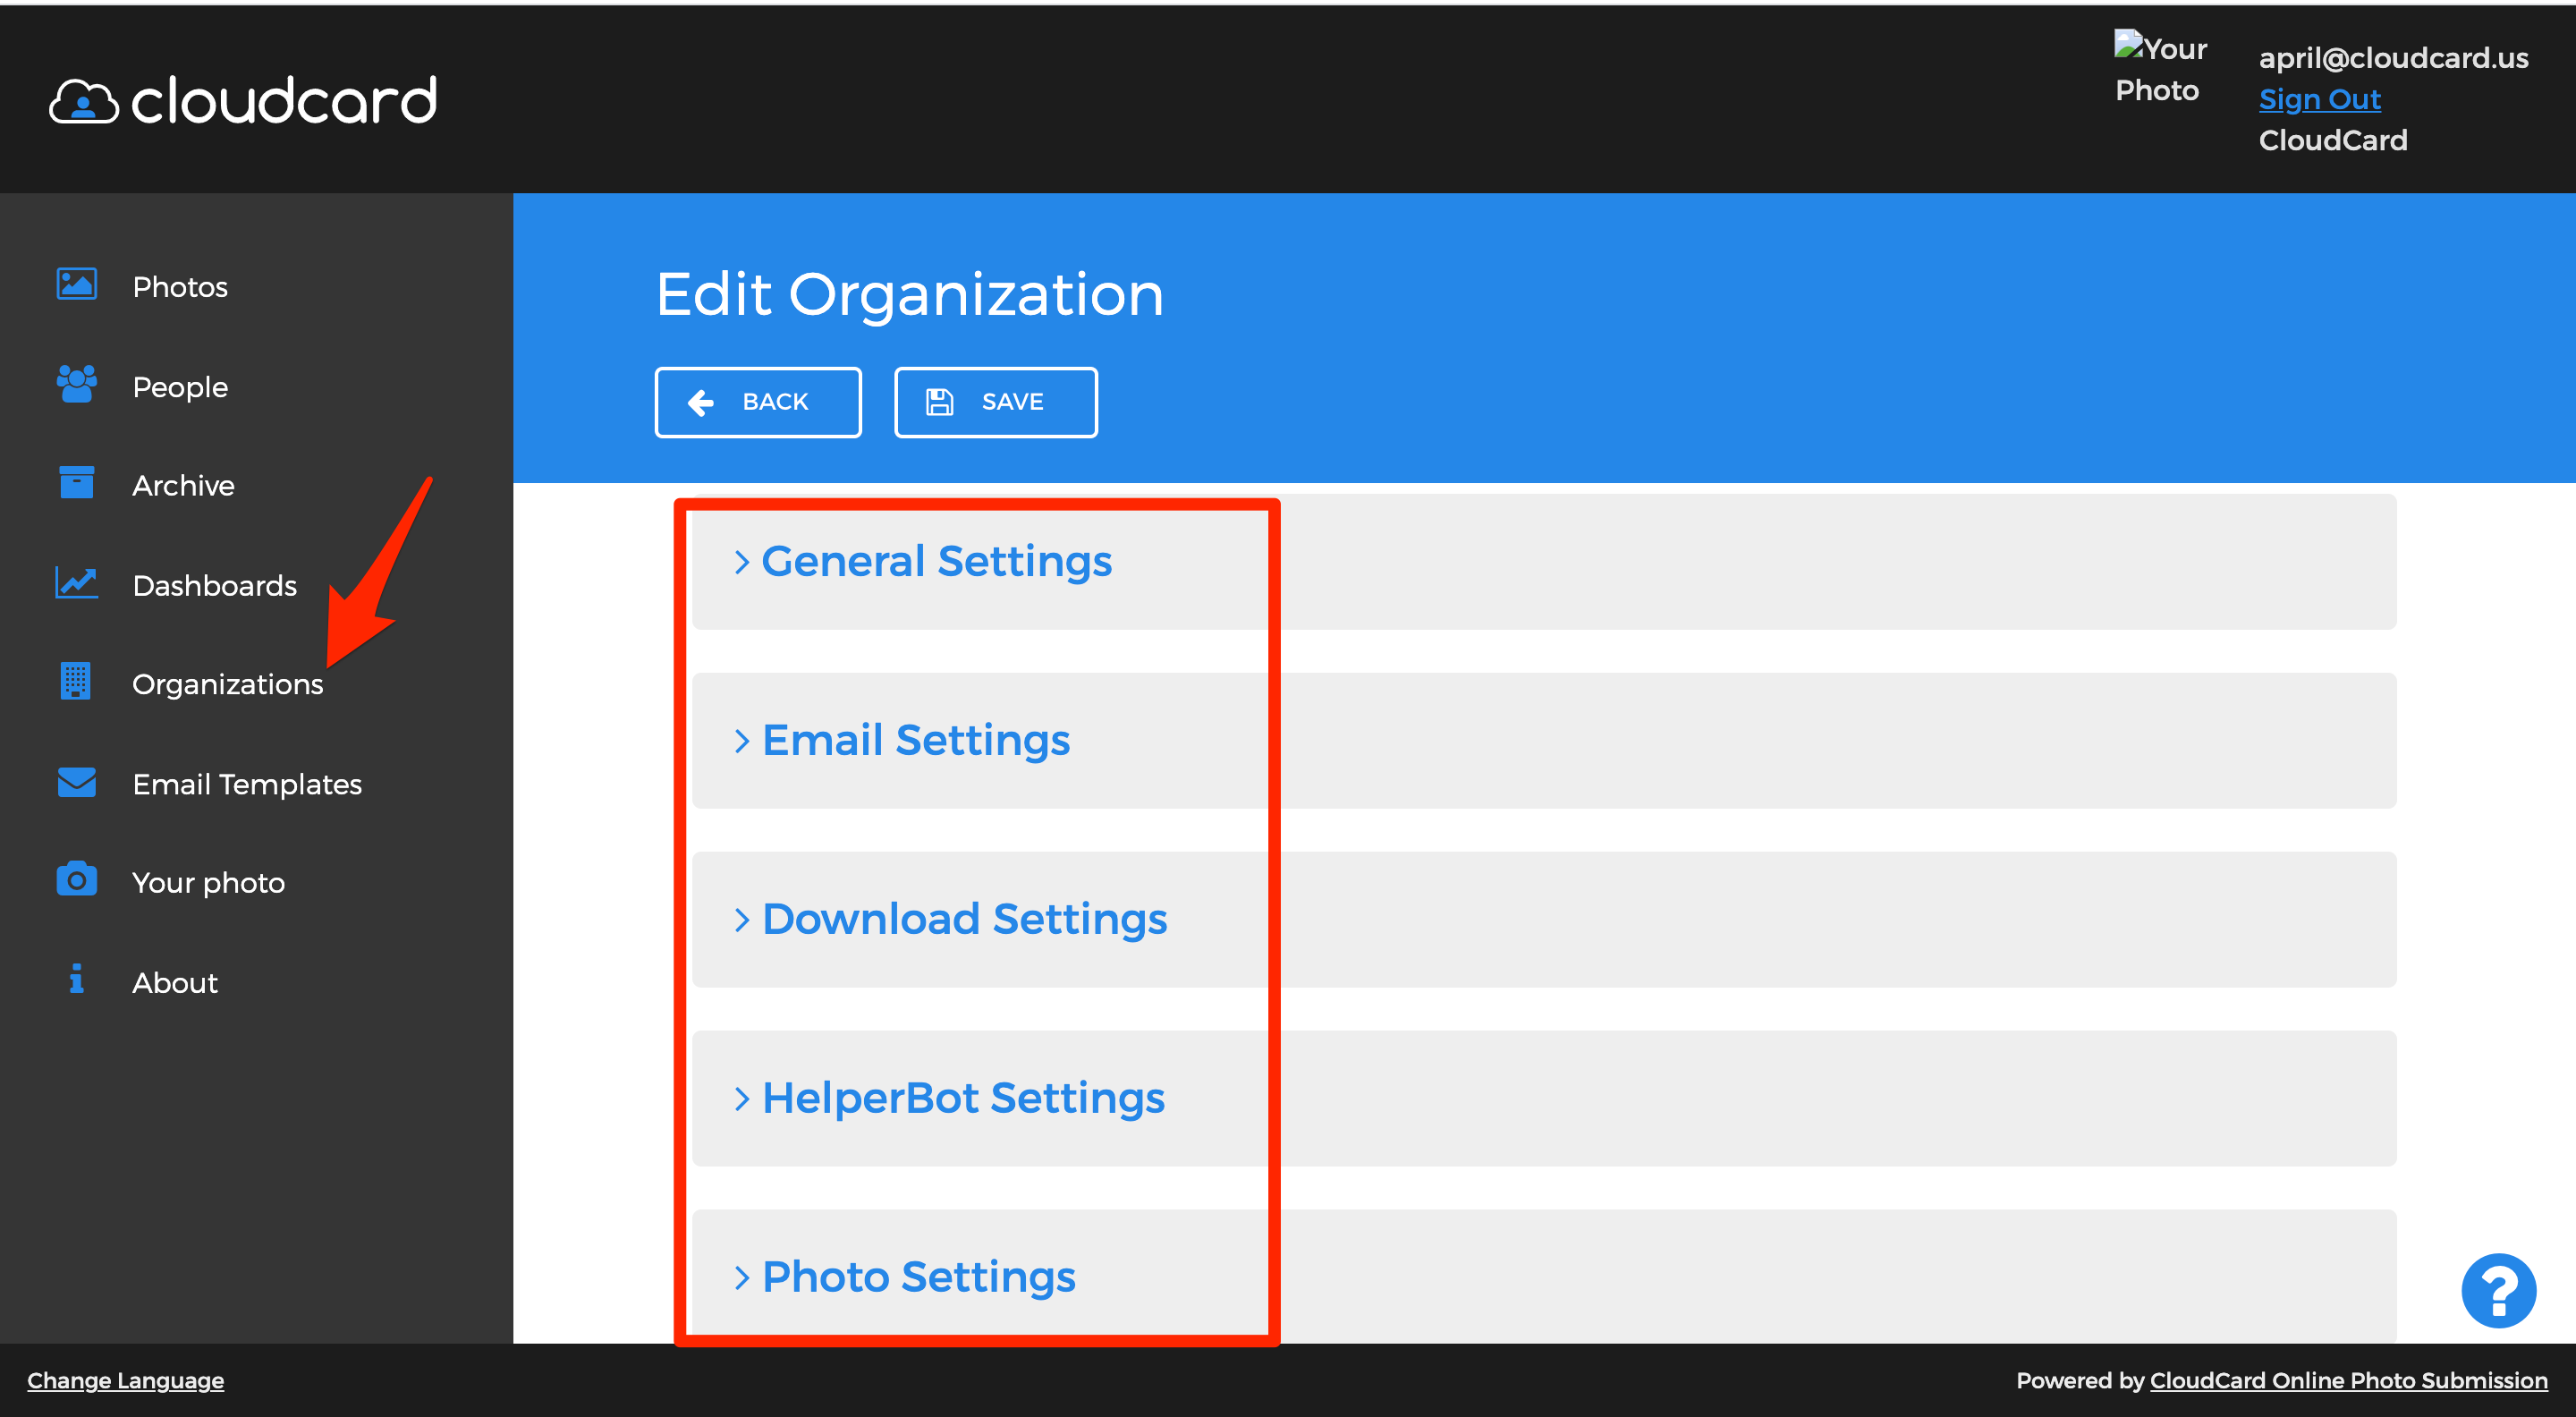
Organization Settings
Now that you're all set up in RemotePhoto, anyone with the Super Director role can configure several Organization Settings to best meet your organization's needs.
Once in RemotePhoto, select Organization in the left column. Search your organization and click on it. You will then see General Settings, Email Settings, Download Settings, HelperBot Settings and Photo Settings.
Keep reading for an explanation of each tab.
General Settings
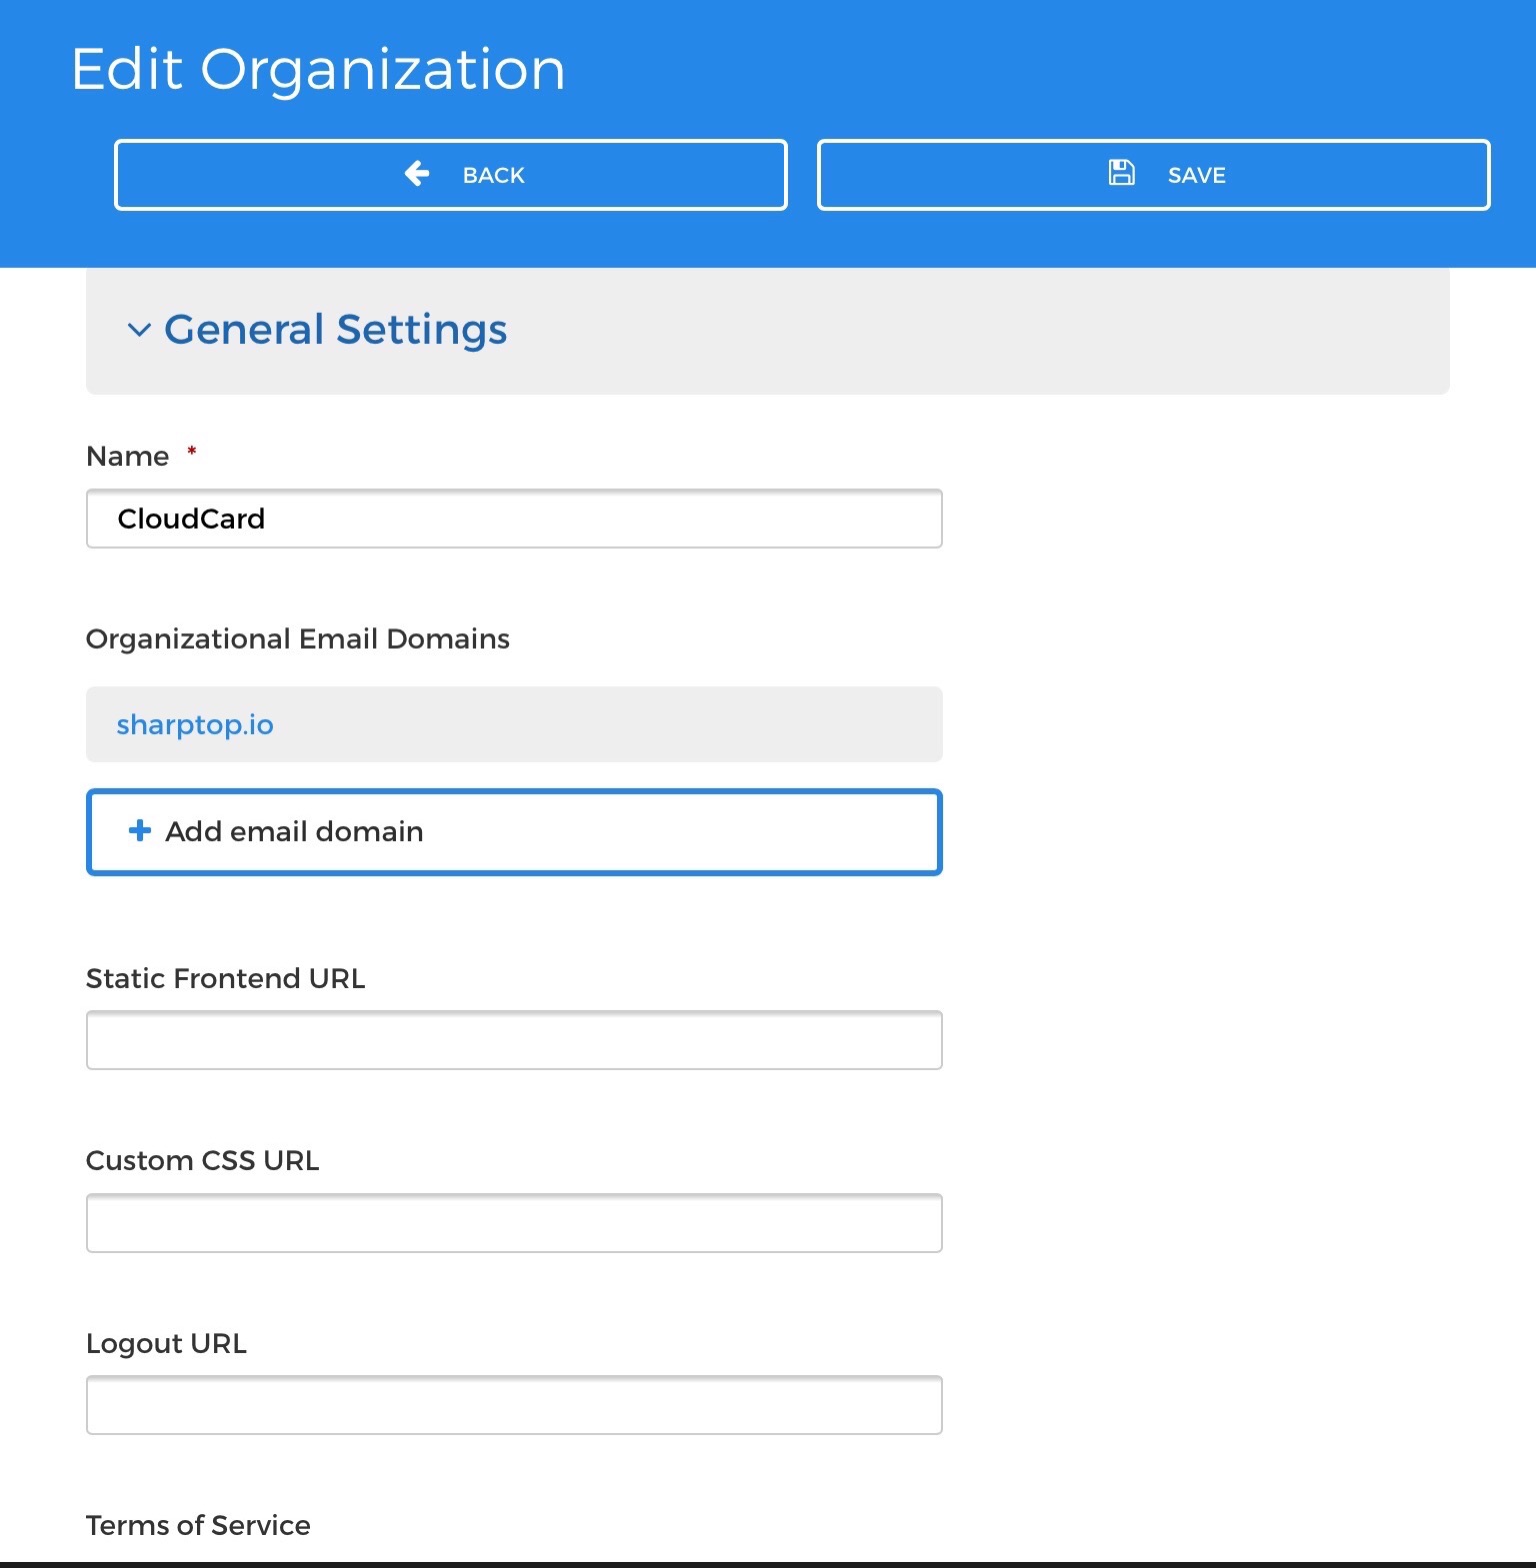
Name
This is the name of your organization.
Organizational Email Domains
The email domain is populated by RemotePhoto to ensure photo invites and requests are associated with the correct organizations.
Static Frontend URL
Not used for integrated photo submission solution. Can be configured by RemotePhoto for some custom implementations.
Custom Theme
Allows you to completely customize your interface (click here for more info).
Custom CSS URL
Set by RemotePhoto based on your configured resources in SP Management Portal and should NOT be changed.
Logout URL
Not used for integrated photo submission solution. Can be configured by RemotePhoto for some custom implementations.
Terms of Service
Terms of Service content may be edited to include institution rules related to use of photo images submitted and privacy policies. These terms appear directly on the web page that is used by the cardholder or others to submit a photo.
ID Number Label
The ID Number Label is only used for administrative purposes as a column header for People Lists. It is set as "Customer Number" by RemotePhoto to correspond with the "Customer Number" in Transaction System Enterprise.
Custom Fields
Custom Fields may be added to the system. These fields provide additional identifiers for People in the system and may be useful when viewing a list of Photos or People. Values for custom fields may be added manually or through Bulk Import. Examples of Custom Fields are: First Name, Middle Name, Last Name, Campus, Role, Orientation Session, etc.
Email Settings

Default Email Group
Templates configured for this email group will be used to send email correspondence to a person who is not assigned to a specific Email Group or the Email Group assigned does not exist.
Send Emails From
This is the Sending email address for your organization; all emails generated by Online Photo Submission for your organization will be sent from this address.
Email Reply-To
This is the email address included in messages that can be replied to for questions or assistance.
Days Between Invitations
Use to set up
Email Reminders. Suppose the initial invitation email does not result in a photo submission. In that case, you can schedule a reminder email to be sent "X" number of days after the initial invite was sent.
Maximum Number of Invitations
This is the maximum number of invitations that will be sent to request a photo, sent in collaboration with the number of days between invitations. For example, if Days Between Invitations is set to “4” and Maximum Number of Invitations is set to “4”, an invitation will be sent on day one when a person is added. If no photo is submitted, another invitation will be sent on day 5, day 10, and day 15 from the original invitation, and then no more will be sent.
Download Settings
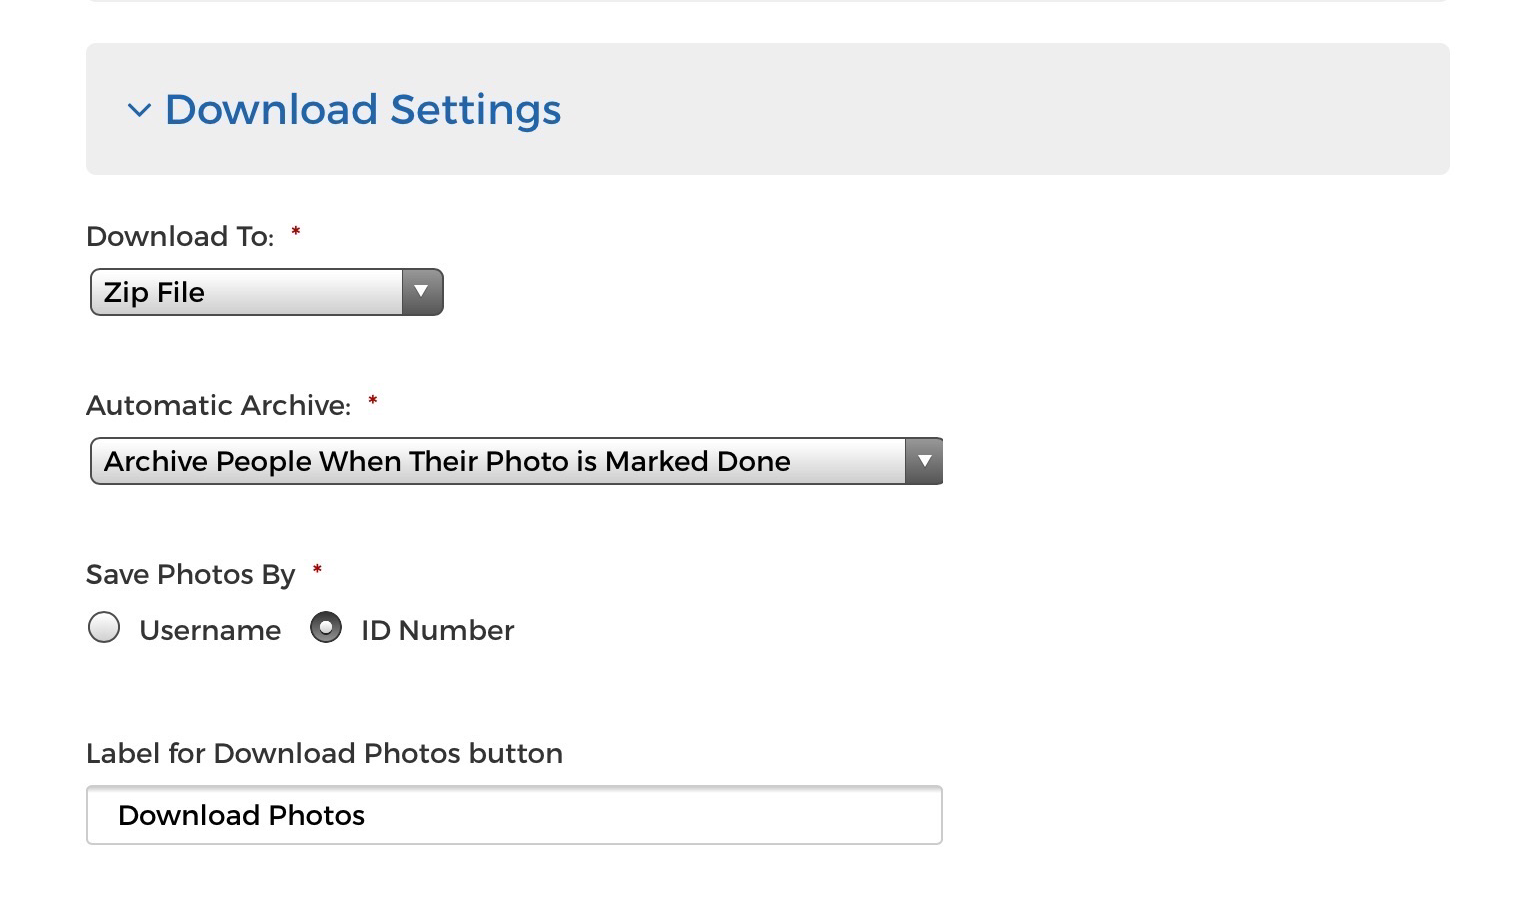
Download to
You can choose to have photos downloaded to a zip file or to an external application.
Automatic Archive
There are several options to choose from if you would like to automatically
archive cardholders:
- Disabled
- This will disable the automatic archive feature
- Archive people when their photo is marked done
- Once a photo is marked done, the record will be automatically archived
- Archive & anonymize people when their photo is downloaded
- Once a photo is downloaded, the record will be automatically archived AND anonymized
- Archive & anonymize people when their photo is marked done
- Once a photo is marked done, the record will be automatically archived AND anonymized
Save Photos By
You can choose to save photos using the cardholder’s username or their ID number.
Label for Download Photos Button
This label text is placed on the button used to manually download photos from the Approve Photos screen.
Helper Bot Settings
Helper Bot is an artificial intelligence system that can automate some of the tasks you previously had to do manually, like photo classification. Helper Bot looks at your incoming pending photos and grades them for quality. More information is available by selecting the “i” adjacent to the heading in the application.
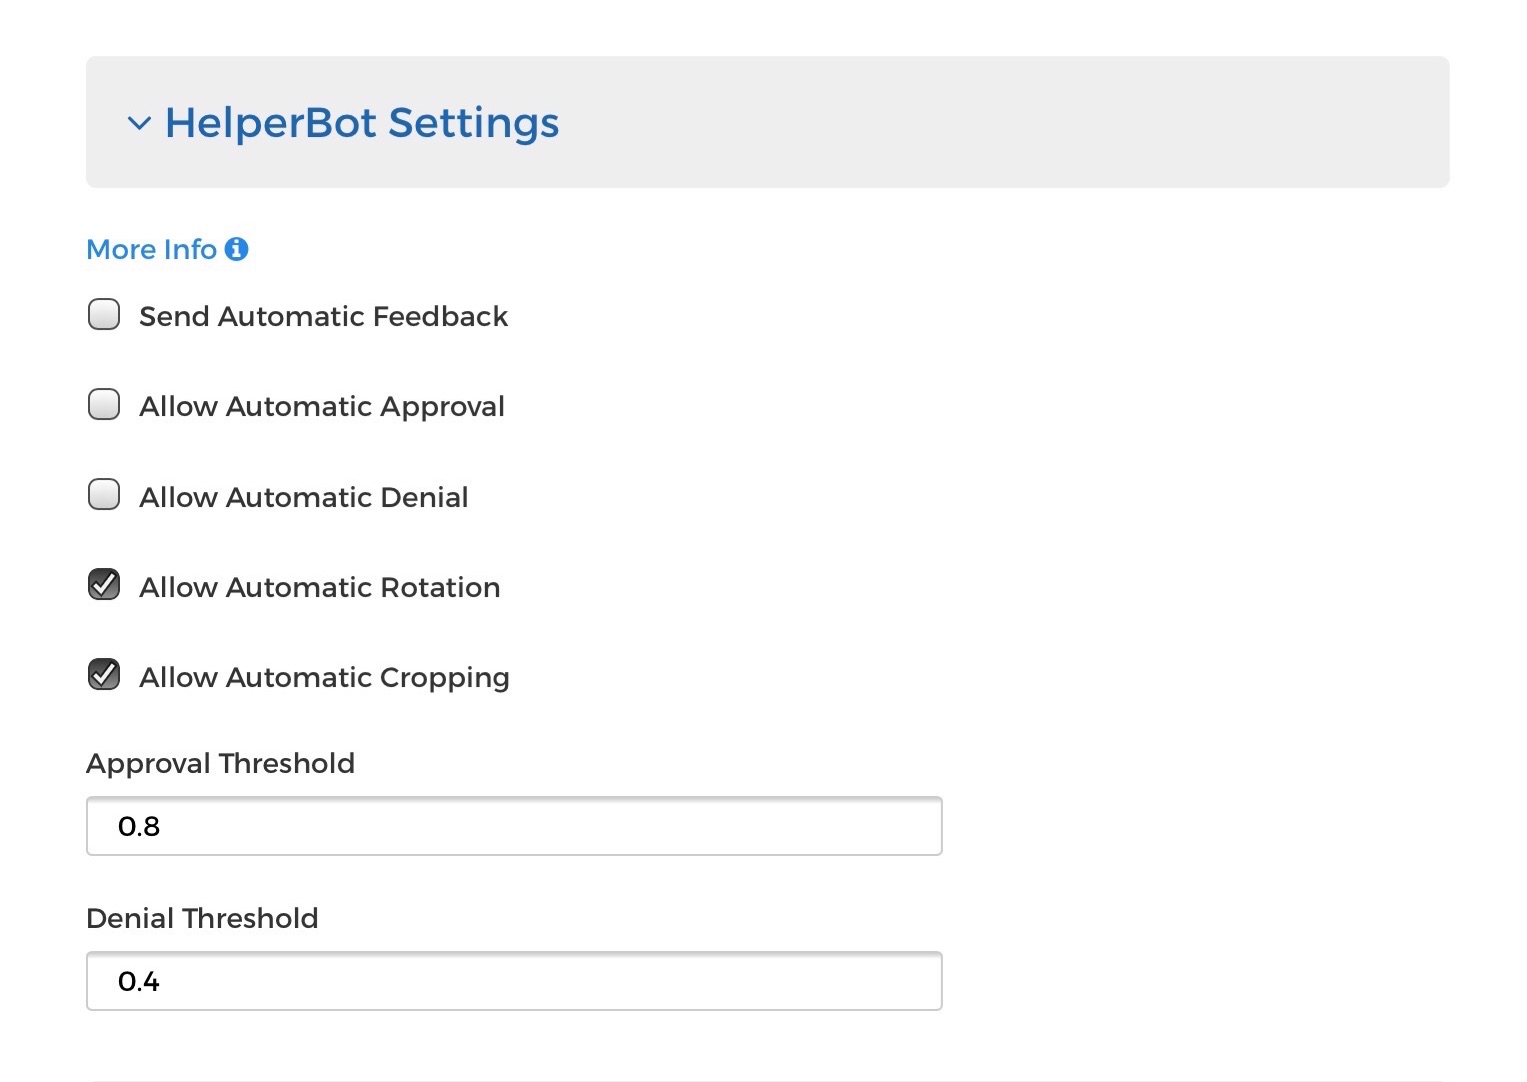
You may choose which tasks you want Helper Bot to automatically perform:
Send Automatic Feedback
Once Helper Bot has graded a photo, it will let the cardholder know what it thinks of the photo.
Allow Automatic Approval
Helper Bot will automatically approve photos it thinks are compliant and email the cardholder to let them know their photo was approved.
Allow Automatic Denial
Helper Bot will automatically deny photos it thinks are not compliant and email the cardholder to let them know their photo was denied.
Allow Automatic Rotation
Helper Bot can automatically rotate photos. Photos taken with an iPhone are especially prone to arrive sideways. Helper Bot looks at all four orientations of a photo and picks which one is the best.
Allow Automatic Cropping
Helper Bot can automatically crop photos to specific dimensions .
Thresholds are the scoring system used by the Helper Bot to approve or deny photos. Helper Bot gives every photo a score as a decimal between 0 and 1. If a photo’s score is above the “Approval Threshold”, Helper Bot marks it as green and automatically approves it when configured. When a photo’s score is below the “Denial Threshold”, Helper Bot marks it as red and automatically denies it when configured. Anything in between the two thresholds is marked orange. The score can be customized to improve accuracy.
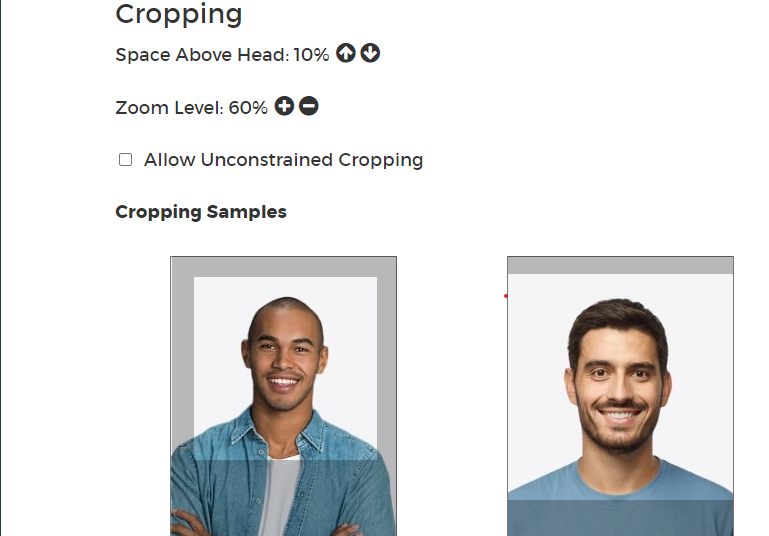
Cropping
Space Above Head
Customize the amount of space Helper Bot will leave or remove above the cardholder's head in the cropping process.
Zoom Level
Adjust the amount Helper Bot zooms in on the cardholder's photo.
Allow Unconstrained Cropping
When enabled, Helper Bot will create extra space outside of the image to better accomplish the other cropping settings. Let's say a cardholder sent in a photo with the top of their head at the very top of the photo. With this feature enabled, Helper Bot will add the appropriate amount of background to the top of the image to account for the desired "space above head" setting applied above.
Photo Settings
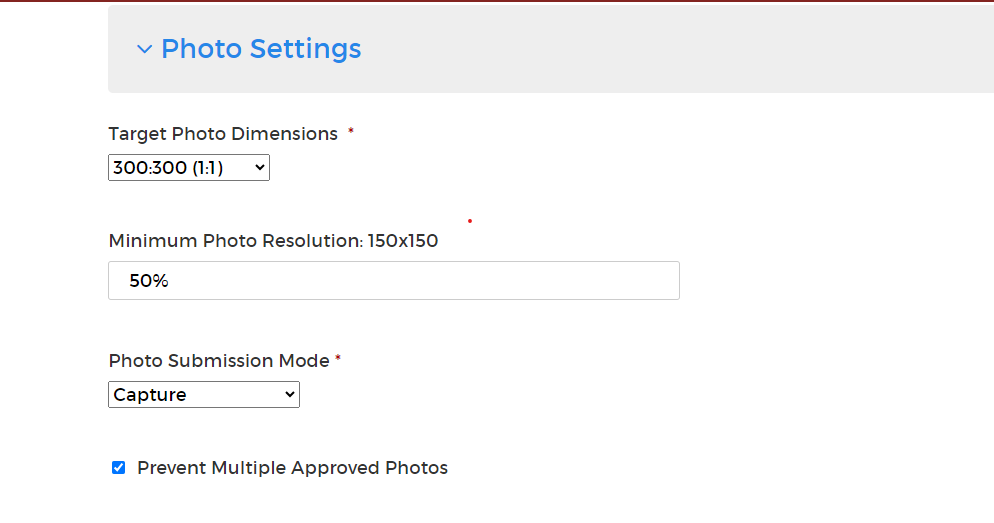
Target Photo Dimensions
This is the relationship between the width and the height of the photograph. You can set the desired size and dimension from the drop down list.
Minimum Photo Resolution
This is the minimum acceptable photo resolution for submission.
Photo Submission Mode
You can choose whether you want the cardholder to submit photos via live capture or upload (or both).
Prevent Multiple Approved Photos
This setting restricts cardholders from submitting more photos after their first has been approved. Selecting this check box prevents a person from submitting additional photos after one has already been approved.
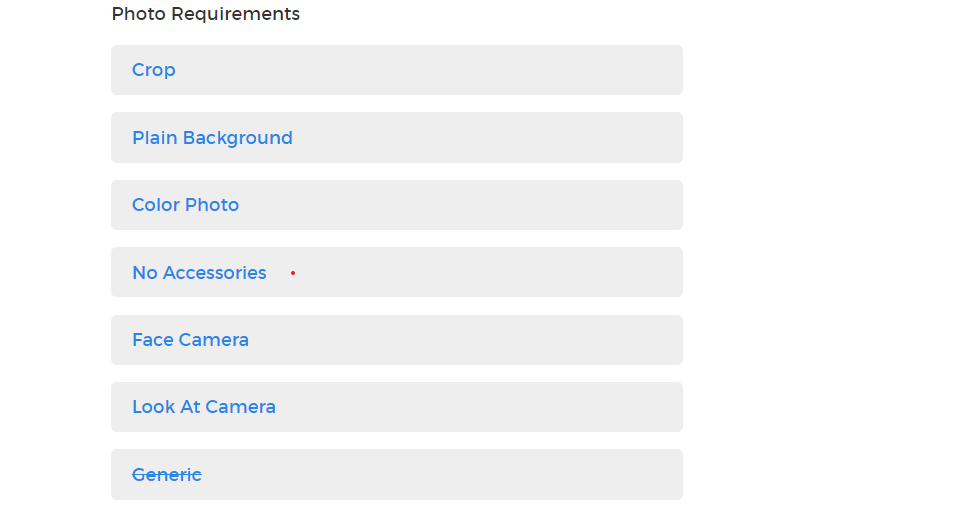
Photo Requirements
You can edit and add photo requirements from this section. Photo requirements will display in the Photo Submission window. These requirements are also used to explain reasons an administrator may deny a photo. An example of a photo requirement would be “Plain Background - all photos should be taken against a plain, light background”.
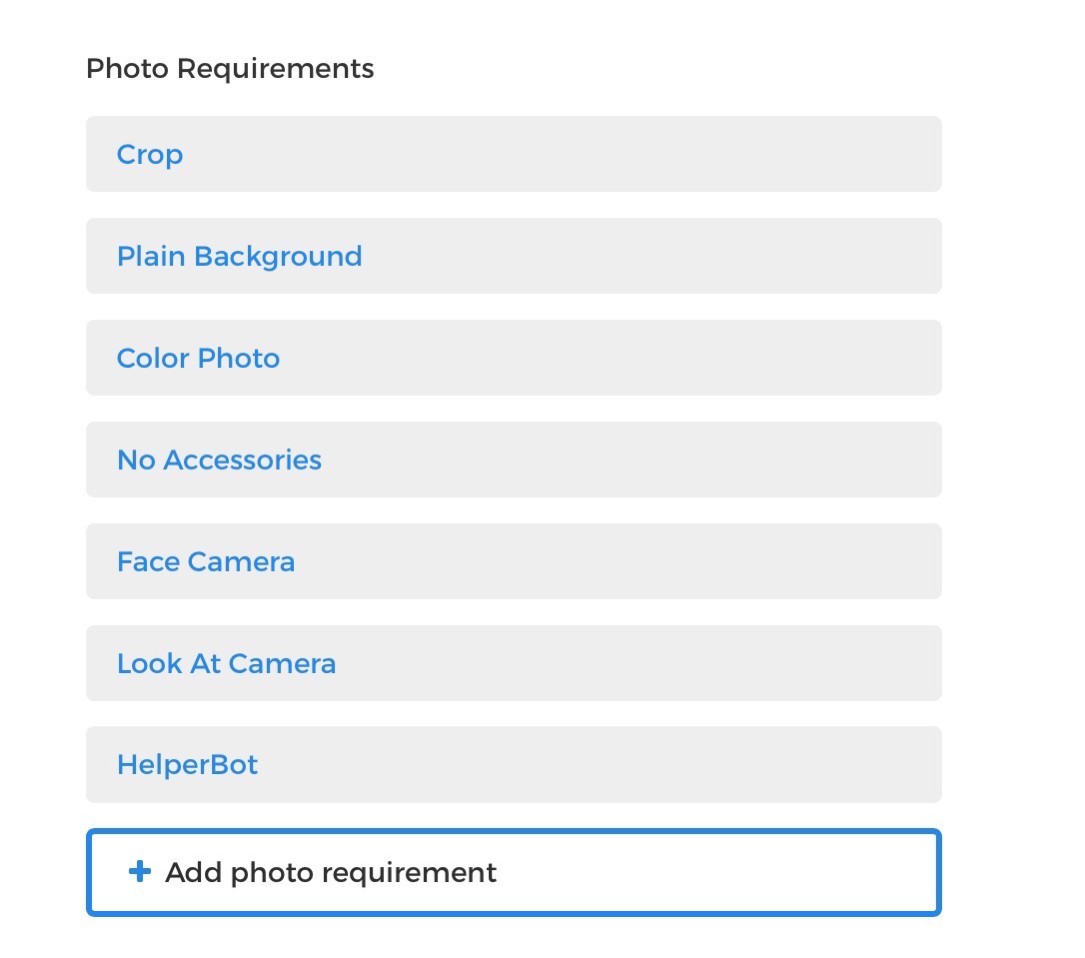
Note: A maximum of 10 Photo Requirements is allowed.
Adding a new Photo Requirement
To add a new Photo Requirement:
1. Click the Add photo requirement link.

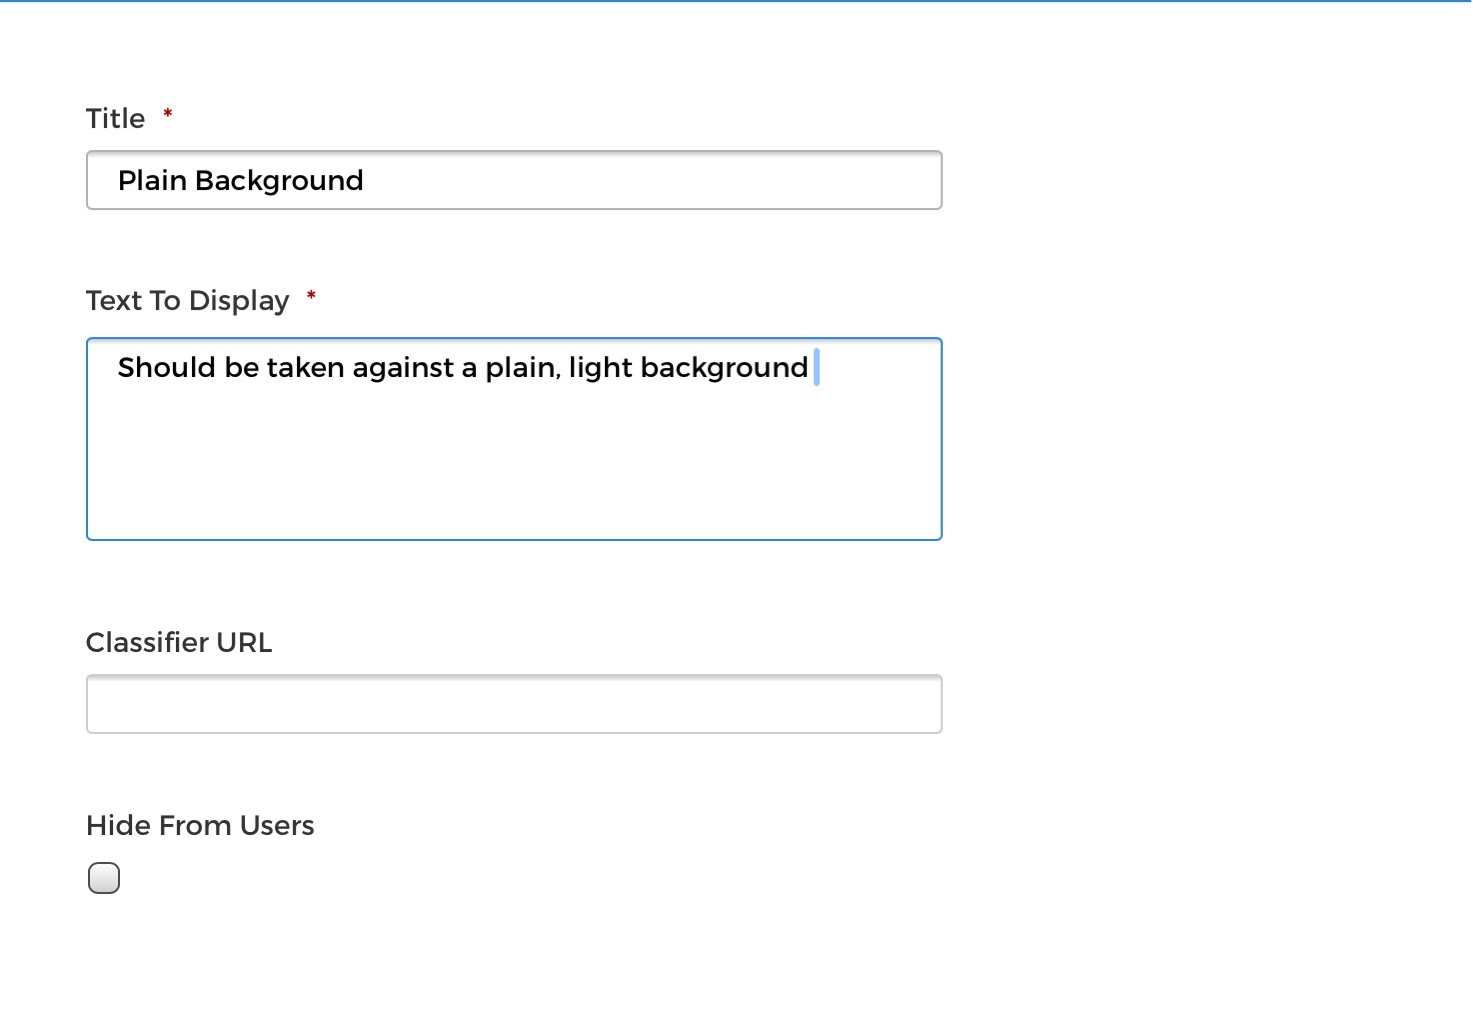
2. Enter a requirement Title. For example: Plain Background. The Requirement Title is used only in the Settings admin window.
3. Enter Text to Display. For example: Photo should be taken against a plain, light background. This is displayed to the end user.
4. Classifier URL. This is only used for Helper Bot or custom resources.
5. Hide from Users. Select the Hide From Users check box to prevent this rule from displaying to end users.
6. Click Save at the top of the page to save all changes.
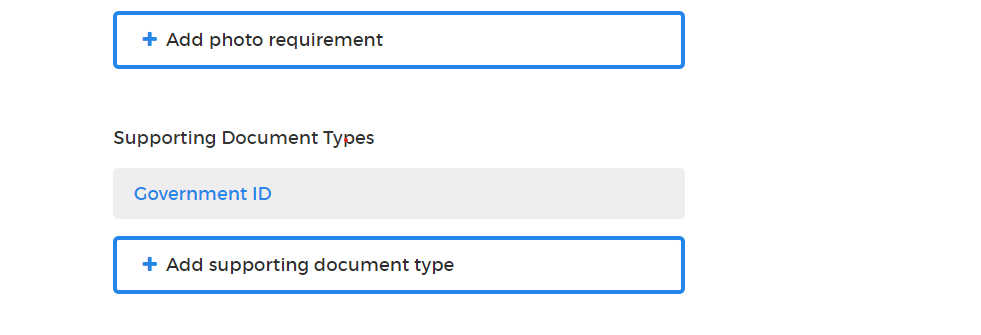
Supporting Document Types
Additional images may be requested from users at the time of the photo upload. This is typically a government issued ID or signature.
1. Select the Add supporting document type button.
2. Enter a Description of the additional photo. This is used to identify the image when viewing in the People List.
3. Enter a Prompt to cardholder message to inform the user what photo/image is needed. Example: Government issued ID.
If Supporting Documents Required is enabled for a person, then the additional photo(s) must be submitted for approval. The Supporting Documents Required setting is in the person record and may be manually set or bulk imported as part of a file.
Supporting Documents are not downloaded or exported as photos are. Supporting Documents may be deleted as part of the Approval or Download process to minimize PII data in the system. Once a person has been approved using Supporting Documents, future submissions will display the previously approved photo for verification of the new photo in place of the Supporting Document image.
.png)


