.png)
How to Create a Static Site
Backstory
We're excited to introduce a new way to create static sites — putting that power directly into the hands of admins outside the RemotePhoto team.
Previously, setting up a static site required a multi-step manual process: OEM partners would email our team to request DNS records, which we'd then generate and send back via a Google Drive link. The partner would pass those records along to the client, who would install them on their end and notify the partner once complete. The partner would then relay that confirmation back to us, so we could finally deploy the static site.
This process puts a lot of weight on the OEM partner. With everything routed through email and shared links, it was easy to lose track of where a request stood. We found ourselves asking, "Is the client still waiting on their IT team to install the records? Had confirmation already been sent back to us?" Partners often found themselves manually following up with clients and with our team just to keep things moving, with no real visibility into status along the way. A single missed email or delayed reply could stall the entire setup, leaving partners unsure whether a static site was days away or still waiting on a step they didn't know about.
With this new process, that back-and-forth is eliminated. OEM partners can now create and manage static sites and DNS records directly within the application, without waiting on our team at each step.
New Creation Process (Video Walkthrough)
Important Note: This is only available to admins
Where are Static Sites?
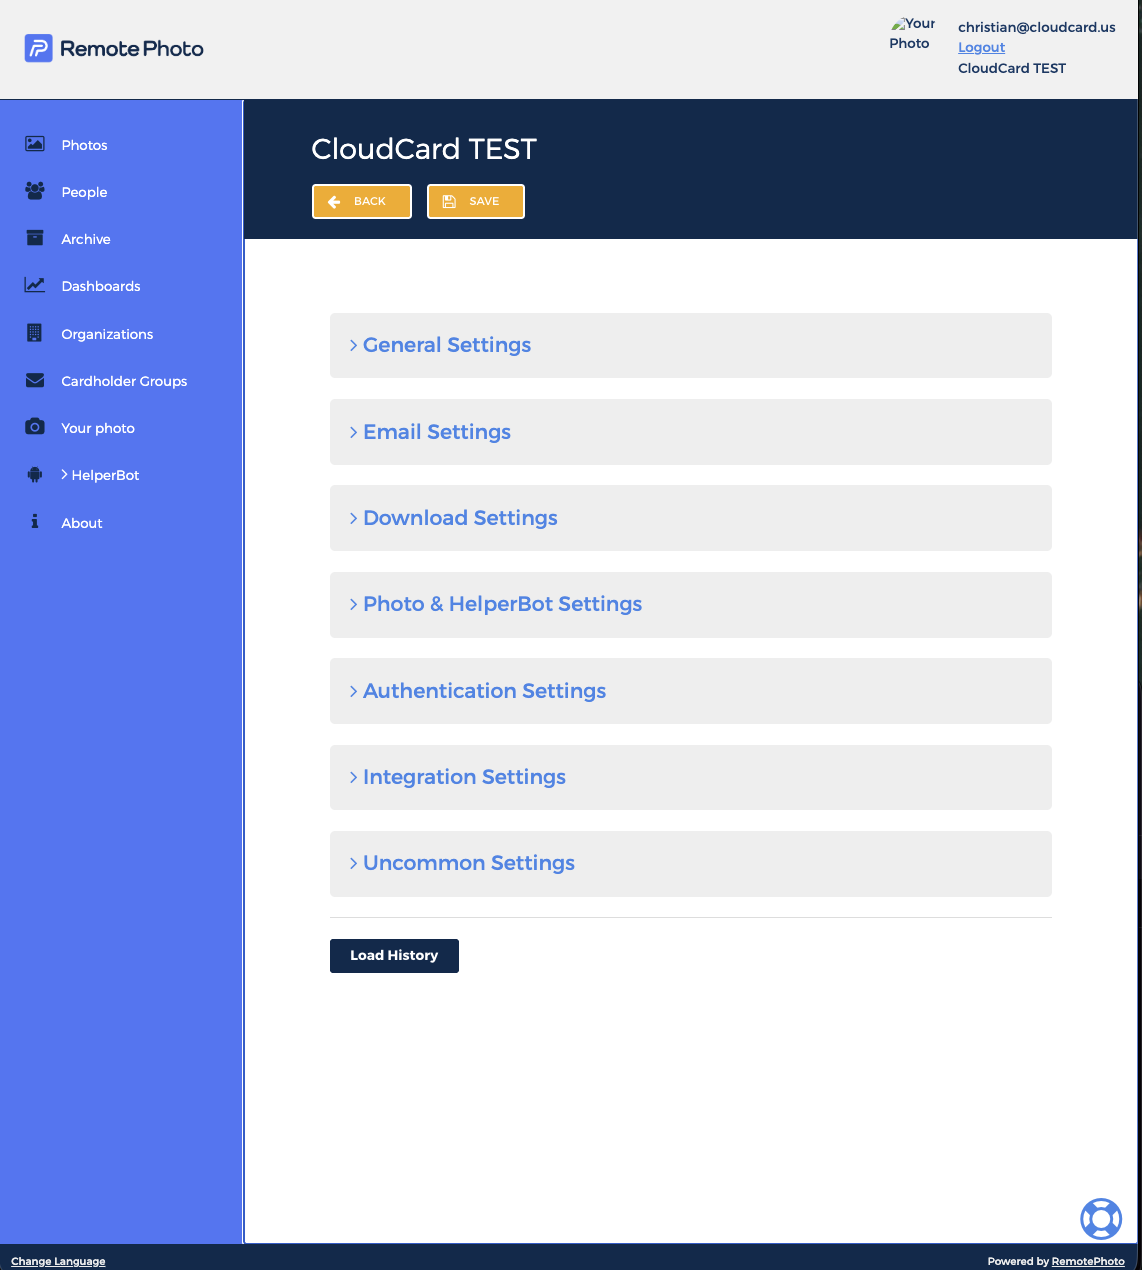
- You can navigate to and administer the desired organization that needs a static site, and open Integration Settings.
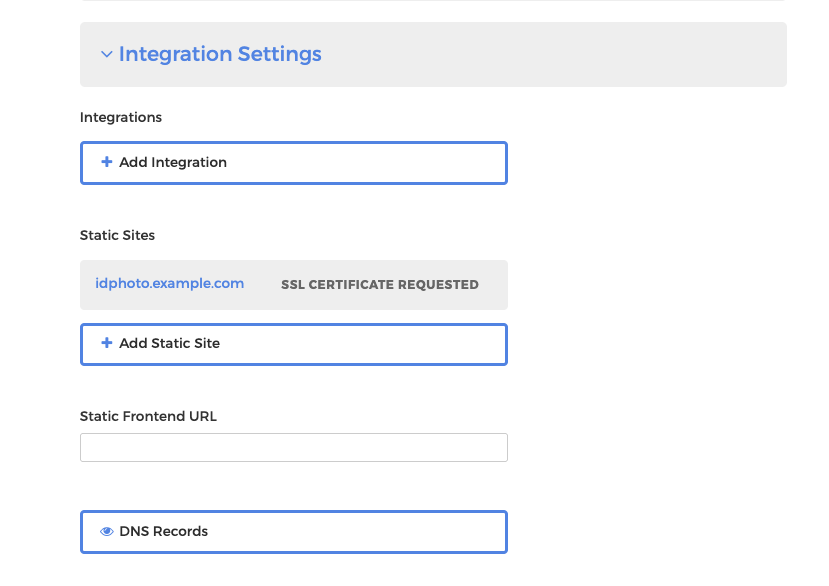
- Click on "+ Add Static Site" to create a new static site.
- The fields listed below are the settings the RemotePhoto team needs to deploy this static site.
NOTE: The modify button needs to be clicked before you can change these fields
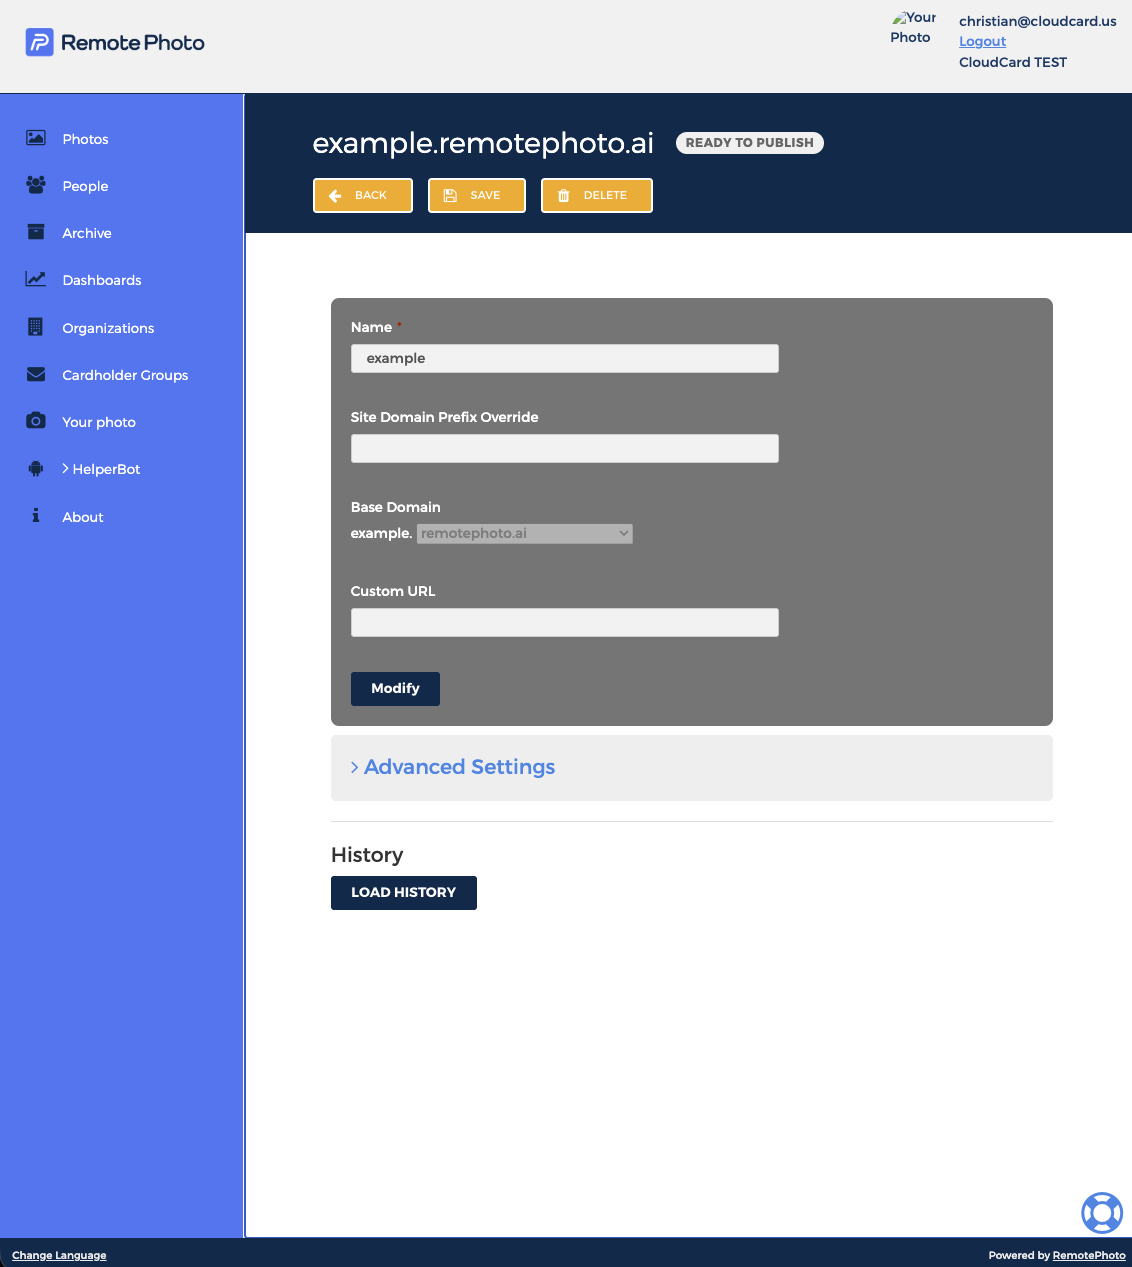
- Name: This is a required field that resembles the client's domain name that displays on their website (eg, remotephoto from https://www.remotephoto.ai/)
- Site Domain Prefix Override: This should be set only on a need basis. It overrides the Name field.
- Base Domain: This dropdown lists the domains we own. If the customer wishes to use one of these, they can deploy a static site without installing DNS records in their domain.
- Custom URL: Setting this field requires DNS records to be installed.
If the client isn't using a custom URL, simply email support@remotephoto.ai to let us know the setup is complete. We will deploy the site resources and notify you as soon as it's live!
Continue if they need a custom URL...
- Once the custom URL is set, you can navigate back to the integrations settings>DNS Records. About 30 seconds after you have input the custom URL, you will see the DNS records the customer needs to install on this page!
How to Share DNS Records with IT? (Video Timestamp: 12:57)
- Create a new user with the IT representative's email address and any ID number (eg, DNS Manager)
- Give them the DNS Manager role, save, and refresh your screen.
- The DNS manager role is stackable with the following roles, if desired:
- Office
- Email Editor
- Director
- Super Director
- NOTE: If the user has the Office and DNS Manager roles, they will see the Setup > DNS Records option in the left sidebar.
- Stacking these roles lets the same IT contact handle other responsibilities in the app (like managing users, editing email templates, or approving photos) without needing a separate login for each function.
- The DNS manager role is stackable with the following roles, if desired:
- Click the Reset Password button to send them an "Access your account" email with a login link attached.
- They can now log in and view the records they need to install on their domain.
- The API will automatically check for the installation of the DNS records
Once the static site status updates to 'SSL Certificate Complete,' email support@remotephoto.ai to let us know. We will deploy the site resources and notify you as soon as it goes live!